Digital note-taking support
Find information about how note-taking support works and how you can access it. Note-taking support works by recording a lecture using Microsoft Teams Premium software, which then transcribes and summarizes what has been said.
On this page, you can see how to get started with note-taking support, step by step.
If you have access to the previous note-taking support via an Echo SmartPen, you can find information here: Digital note-taking support - Echo SmartPen
1. Apply for note-taking support
To be granted note-taking support, you must first apply for compensatory support. On the page below, you can read about how to apply for compensatory support.
Apply for compensatory support
2. Access Microsoft Teams Premium
Using the Microsoft Teams Premium software/app, you can record, transcribe, and summarize lectures.
Funka and KTH's IT support will help you obtain a license for Microsoft Teams Premium. You can then download the software.
Download the Microsoft Teams software/app
You can download the Microsoft Teams app at the link below.
Download Microsoft Teams (microsoft.com)
If you use Windows, you can also download Microsoft Teams via the built-in Microsoft Store app. Search for Teams in the Microsoft Store and download the app.
Check that your Premium license is activated
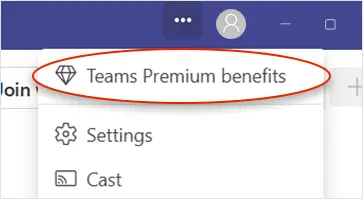
You can see that your Premium license is activated when a window with the message “Welcome to Teams Premium” opens in the app. You can also check that the license is activated by clicking on the three dots in the upper right corner of the window. If it says “Teams Premium benefits”, your license is activated.
If your license is not activated, contact it-support@kth.se .
IT support for Microsoft Teams
You can find IT support for Microsoft on KTH's intranet via the link below.
IT support for Microsoft Teams
3. Record the lecture and start transcribing
You record, transcribe, and summarize the lecture by starting a meeting in Microsoft Teams Premium that you have running during the lecture.
Please note that you will be recording the lecture yourself and therefore personal attendance is required. We recommend that you sit close to the lecturer.
Start a meeting in Microsoft Teams Premium
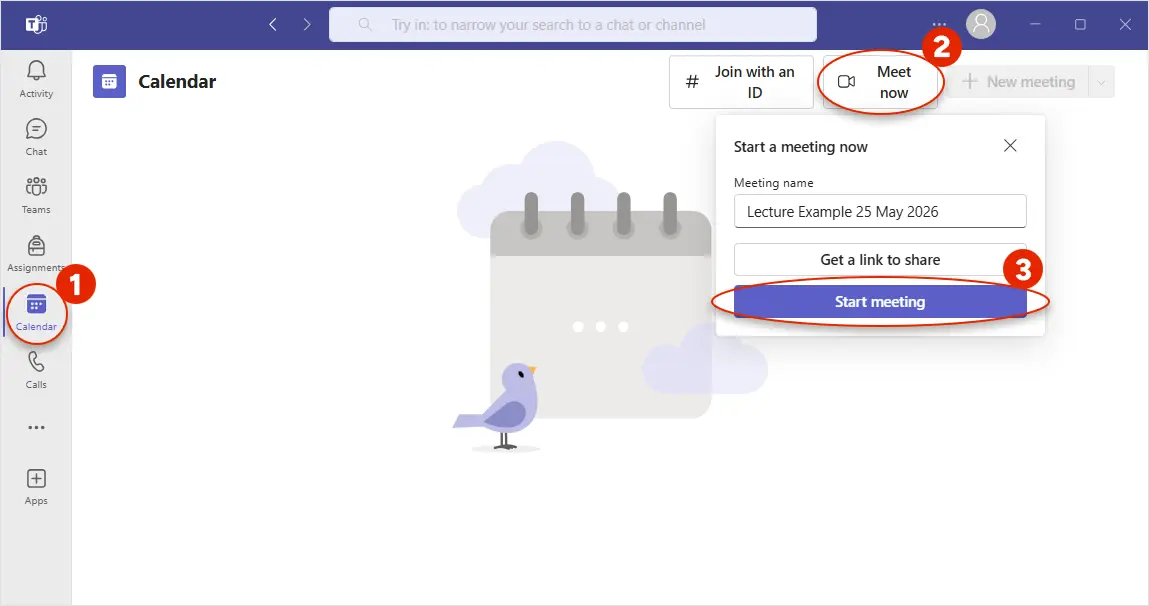
To start a meeting in Microsoft Teams Premium, first click "Calendar" in the menu on the left. Then click “Meet now” in the upper right corner. Name the meeting so you remember which lecture you recorded. Then click “Start meeting.”
Enable noise suppression
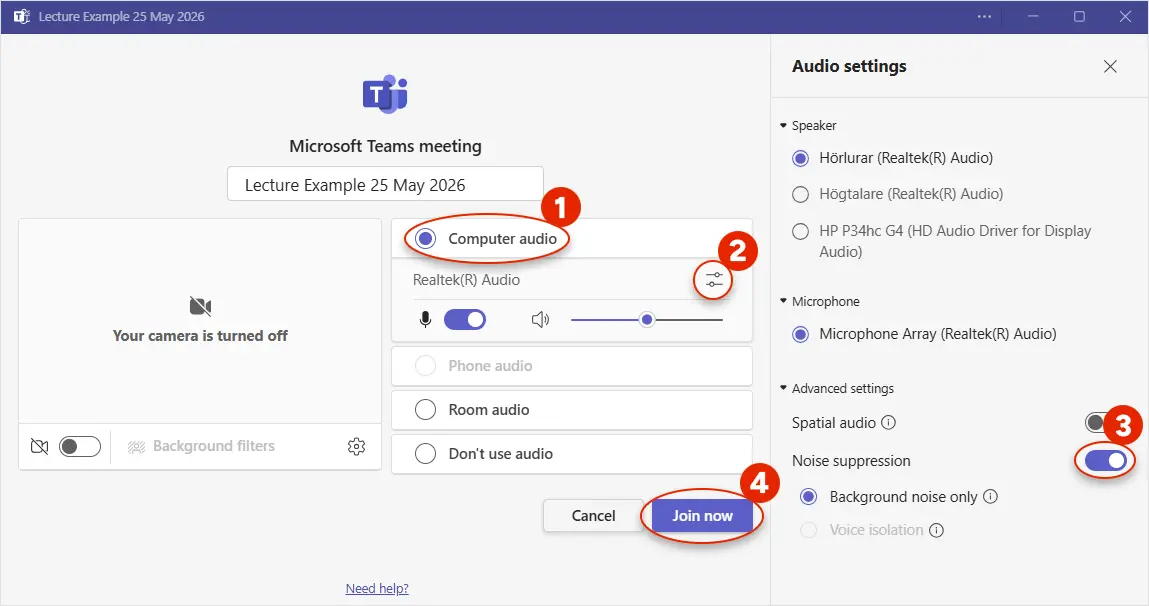
Select “Computer audio” on the right side of the box. Then click on the icon with two lines and two circles, “Audio settings,” located on the right under the heading “Computer audio.” Ensure that “Noise suppression” is enabled. If you do not activate noise suppression, there is a high risk that the transcription and summary will be poor. Also check that the correct microphone is being used if you have multiple connected.
Then start the meeting by clicking on the button at the bottom of the window, “Join now.”
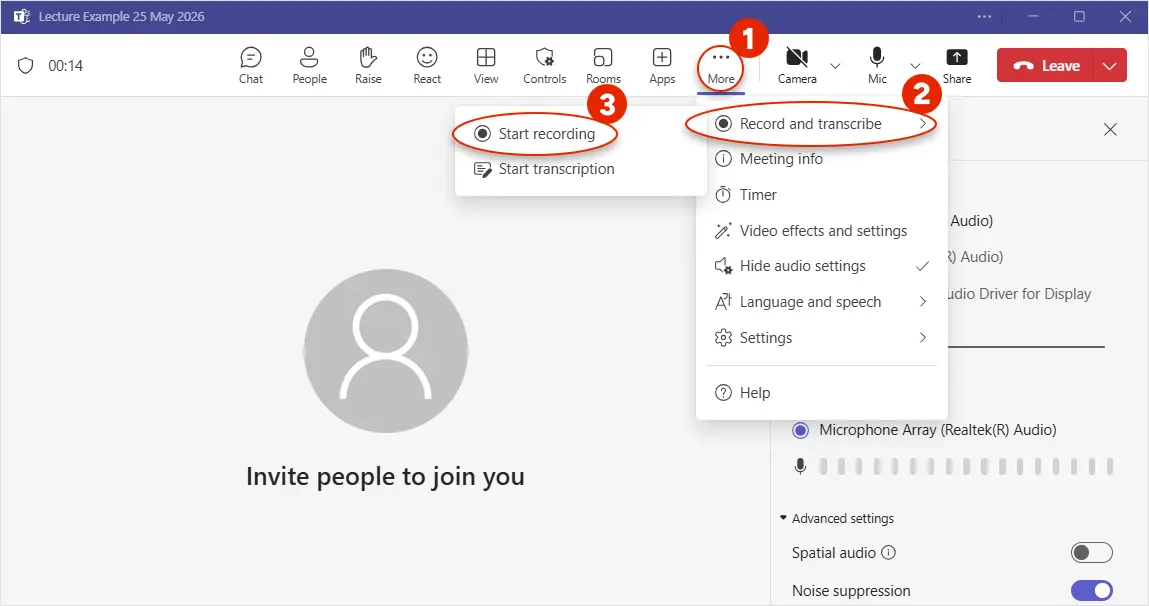
Activate recording and transcription of the meeting
Start recording and transcribing the meeting by clicking on the “More” menu option, selecting “Record and transcribe,” and then “Start recording.” If you select “Start transcription,” no audio recording of the lecture will be saved, only the transcription and summary. Then select the language to be transcribed, the language in which the lecture is held.
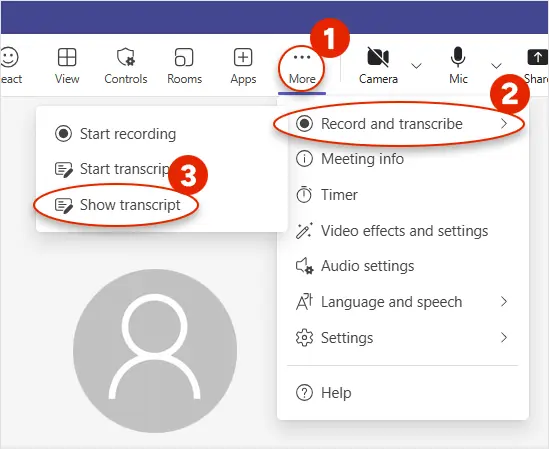
The meeting is now in session and the transcription has begun. You can view the transcription in real time by clicking on “More,” “Record and transcribe,” and “Show transcript”.
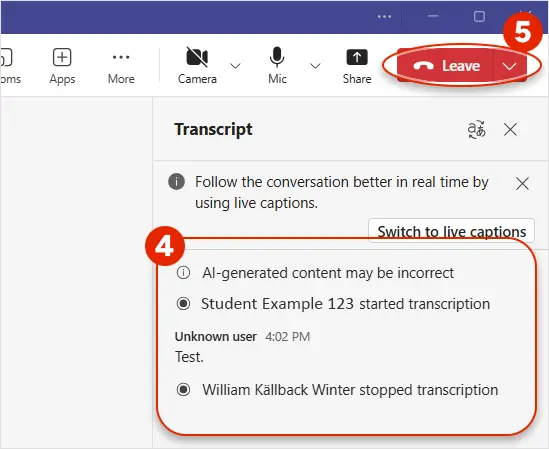
The transcription is now visible in real time in a box on the right. When the lecture is over, leave the meeting by clicking on the red “Leave” button in the upper right corner.
4. Get a summary of the lecture
The transcription and summary of the meeting are automatically saved and created as a file. You can find the transcription and summary in the chat by clicking on “Chat” in the left-hand menu. Click on the “Transcription” file.
Please note that the transcription may take a while to appear. If it is not visible in the chat, it is not ready yet.
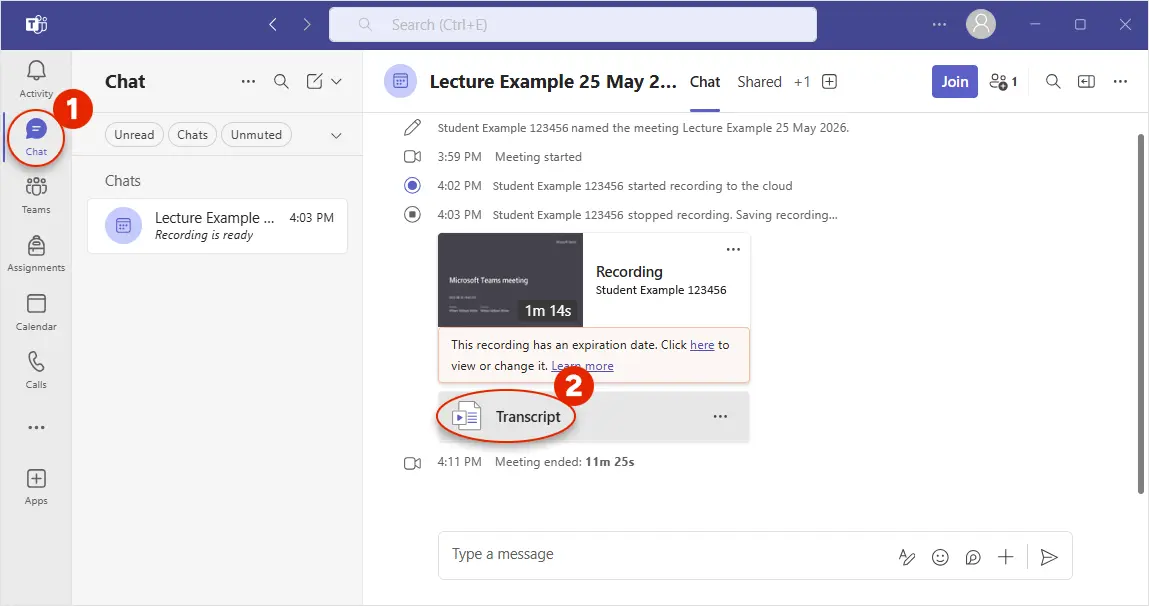
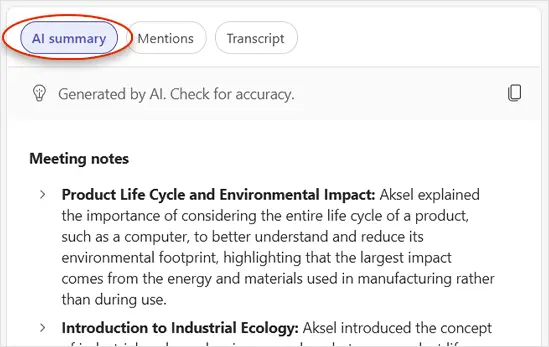
Then click on “AI summary” to get the lecture summarized in a few bullet points.
We recommend the AI summary over the transcription as it summarizes the lecture well without you having to sift through everything that was said.
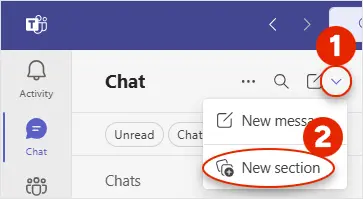
Tips for organizing summaries
In Teams, you can create a section in the Chat view to organize your lectures. This can be helpful if you use Teams for other chats or have many recorded lectures. Click the arrow on the far right after the “Chat” heading and select “New section” to create a section in the left column.