Chip-programming with Quartus (en)
![]() Chip-programming with Quartus
Chip-programming with Quartus
Choose chip programming equipment - USB-Blaster
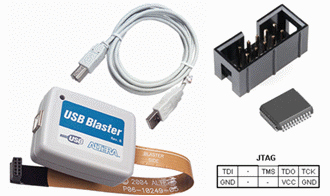
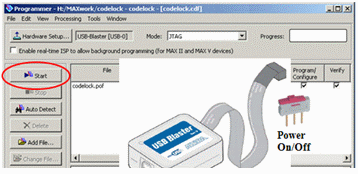
Connect the USB blaster to your computer. Connect the USB Blastern JTAG connector to lab equipment. Note! The lab equipment's voltage shall be off when plugging in or unplugging the JTAG connector. Lab equipment's voltage must be turned on when you program the chip - USB power alone is not enough for this.

![]()
From within Quartus, select the menu item Tools and Programmer, or you clic the icon Programmer.
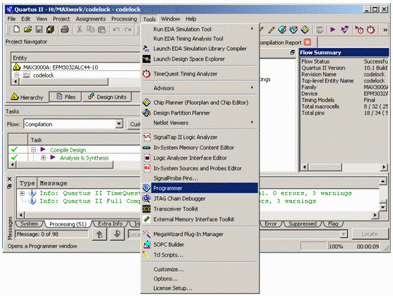
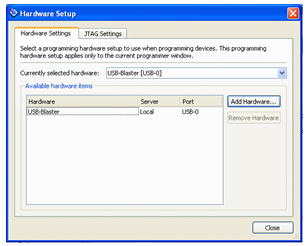
In the window Programmer you clic on Hardware Setup in order to select the USB blaster as the programming equipment. (The computer then remembers this setting).

In the window Hardware Setup there is a list of "Available hardware items". There stands USB blaster. (If not then you may have forgotten to plug it?) Select USB-blaster and clic on Add Hardware.
Now the USB-blast should be your "Currently selected hardware". click on Close.
Quartus will remember your choice, so probably you do not need to repeat this one more time.
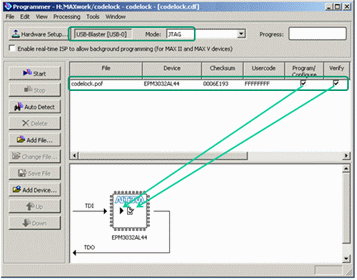
In the window Programmer you can see what hardware (chip) that is selected.

Download the code to the chip
![]()
The compiled program is in a *.pof-file. Browse to it with Add File ... ( it is probably in a subfolder output_files ) and choose the file.
The compiled project name is now in the box File.
Check Program/Configure and Verify. In the picture with the chip there is now emerging symbols of your choices.
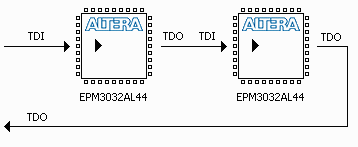
It is possible to program many chips in the same equipment. The picture then shows a daisy chain of the chips that can be programmed, one at a time with different code.
We only have one chip, and you start programming by clicking on the Start button. Attention! Do not forget that the power to the lab card should be on during programming!

Try twice if it does not work - then contact the lab assistant.
The most common problem is a bad battery